6.2.1. Monitor Group
Monitors are grouped in a hierarchical structure based on Departments, RPE and Tags. A click on any sub node of RPE, Department or Tag will show the monitors provisioned under it. Note that a group that does not have any monitor will not show in the list.
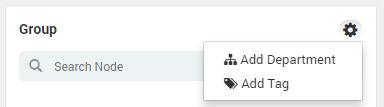
Search Node: Type the name of the group (Department, RPE or Tag) to search from the list. It is a simple search that helps you quickly locate the group name from all of the list. Click on the settings icon to create a new department or tag.
Create New Tag and Department
You can create a new department from here but only the admin can assign monitors to the department. However for tags, you can select the monitors on the grid and assign a tag to them.
Group by Department: The list shows all the departments in the group. However, you can only see your departments (that you have access to) here. This is useful when you work for more than 1 department. You can filter the monitors in the grid based on your department. To understand how to group monitors based on the department, consider this example:
You have some network assets/monitors that you want to see in Motadata.
You created a credential profile in Motadata to access your monitors. This credential profile has to be attached with your department.
Using the credential profile you’ll discover the monitors and provision them.
The monitors will be associated with the departments in credential profile.
You can filter/group monitors based on the department.
Group by RPE: Similar to department, the list shows list of RPE servers available in Motadata. When you select a RPE server, Motadata filters the monitor grid and show only RPE discovered monitors. You select the RPE for a monitor during discovery phase.
Group by Tags: Tags are the logical names that helps you classify or group the monitors. Select a tag and Motadata will filter the monitors based on it. Motadata has a long list of tags that you can use or also you can create your own tags. See Monitor Tags for details.